1. Refer out!
We are strength coaches and personal trainers, NOT doctors. We do not make medical diagnoses. Anything that is painful, please refer out to a doctor or specialist in your area. Do your best to make this person a part of your network as it’s about helping the individual, not about egos. In the end, everybody should win: you, the doctor, the therapist, and most importantly the client/athlete.
2. Ask them: Does it hurt?
Only a yes or no answer will suffice. “Kind of,” “not really,” and “only when I…” are a yes. Refer out, and then regress or eliminate any exercise that causes pain. Read Coach Boyle’s “Does it hurt?” article for more information.
3. Use an assessment.
At MBSC, we use systems from Functional Movement Screen like the FMS and SFMA. We find these to be the best systems currently available to look at gross movement quality and identify entry points for improvement in training.
When using the FMS, specifically for pain-free clients, the simplified scoring system allows our coaches to put clients into buckets based on their movement quality. Scores of 2 or 3, don’t raise any red flags meaning they can continue training the associated pattern normally. A score of 1, would signify a limitation in gross movement quality, warranting a regression to an simpler movement and further investigation into local joint movement quality. A score of 0 means there is pain associated with the movement, meaning we refer the client to a medical professional for treatment and continue to train the non-painful patterns. Generally speaking, non-specific back pain clients could use more mobility in their hips and thoracic spine and improved motor control of their hips and core musculature.
If you are not familiar with the Functional Movement Screen, you can employ the “Does it hurt?” method above and set up your programming from there. *Note: There are always exceptions to the rule. Think young pliable athletes and yogis. Usually, they’re a case for getting stronger, not more mobile!
4. Manage your expectations.
Training age, chronological age, previous injuries, joint replacements, and surgeries are all variables that could negatively effect training outcomes, although they’re not an excuses for in-action. Braces, sleeves, ice, heat, taping, compression, NSAIDs, and passive care are just band-aids. Their purpose is to minimize inflammation, stabilize the injury, and help the healing process. Once a cut (injury) heals, you wouldn’t keep wearing a band aid (modalities & passive care) would you? These modalities are meant to be used sparingly, not relied on.
5. There is always something…
we can be doing while an injury heals. If your right arm is broken, you have three other limbs and a core to train. The positive systemic benefits of exercise on the human body will aid in the rehabilitation of (X) body part or segment even if you are not training it directly. Movement is Medicine.
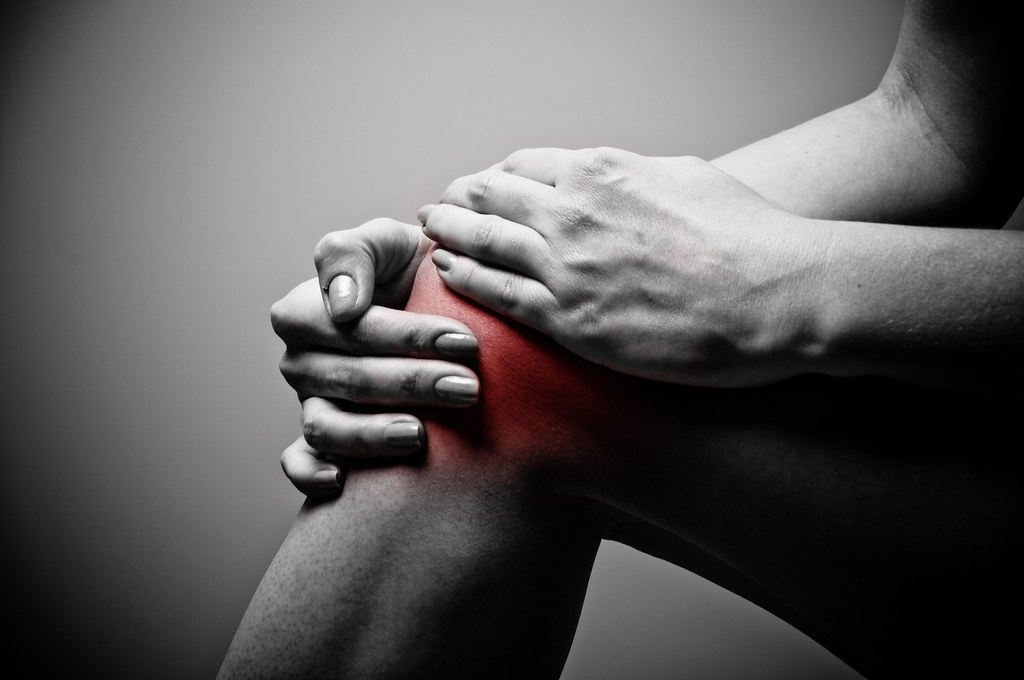
6. Knee Forward vs. Vertical Tibia Debate
A healthy knee is meant to travel forward over the toes. If it wasn’t, we wouldn’t be able to walk, run, or jump. With that said, when training someone with knee pain it is best to stay “Hip Dominant” where there is minimal to zero forward translation of the knee/tibia. This will spare the knee and put most of the focus on the hip complex. While this is not how the knee joint necessarily works, it is a good way to continue training the legs and hips while pain/inflammation are decrease and motion of the knee is restored. This is where it is important to be working with a medical professional.
Note the word “troubleshoot” here. Anything below could be contraindicated depending on the individual. We have found through our experience that the information provided below has worked well for our knee pain clients. Please consult with a good physical therapist, chiropractor, or doctor who understands the importance of quality movement to get a second opinion on your programming. We see this as “best practice” for any injury: everyone working together for the sole purpose of getting the client healthy.
Below are some of our favorite ankle mobility drill & hip stability drills:
*Note: these mobility, flexibility, and low-level stability drills are done for breaths and NOT for time. Breathing is the only way we can consciously regulate the autonomic nervous system to relax. Coach breathing during the initial phases of your training and it will carry over into everything else you do.
Slowly begin to add in more explosive and heavy work as the client progresses. Some exercises may never again be possible and will always be contraindicated for that individual. That is the reality. Set your goals high but have realistic expectations. Trial and error will be a part of the process. Use our Phase 1 Intro Adult Program and regress or eliminate from there. Remember when someone has knee pain in training to decrease impact forces, do your best to maintain a vertical tibial, all the while working with a good doctor, therapist, or both to restore function.
The accompanying example program is our Intro Phase One Adult Program. The contraindicated exercises have been replaced with exercises that may be a better choice. Remember, each person is different. There is no timeline on when it’s appropriate to progress. The provided program is a great place to start. Regress and progress as needed, with the end goal being to get every client into our Returning Adult Program pain-free and without any compensations.
Interested in learning more? At our Certified Functional Strength Coach course you will experience 8+ hours of hands-on coaching. We will take you through each of the regressions and progressions mentioned above and share with you the system we use to train large groups of clients and athletes.
This article was written by CFSC Coach Brendon Rearick. He can be contacted at brendonrearick@gmail.com
Copyright © 2025, Certified Functional Strength Coach. All Rights Reserved.
Privacy Policy | Yelling Mule | Boston Web Design